Overview
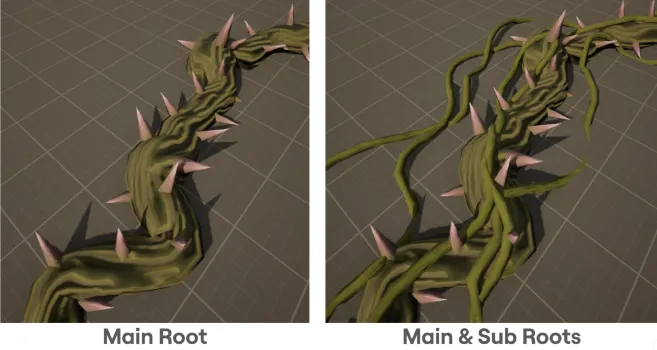
This tool generates roots on surfaces using a curve as the main input. The bigger main root is fairly simple, uses the curve input and applying noise (horizontal and vertical) to it, then ending with a sweep. The smaller sub roots uses the same curve as the main root, but a different set of noise is applied. A couple of features such as snapping to surfaces and rotating the snap direction are developed to make the tool easier to use. Furthermore, this tool works together with a growth vertex shader, allowing the roots to grow or retract by changing one of the material's parameter.
Noise Offset
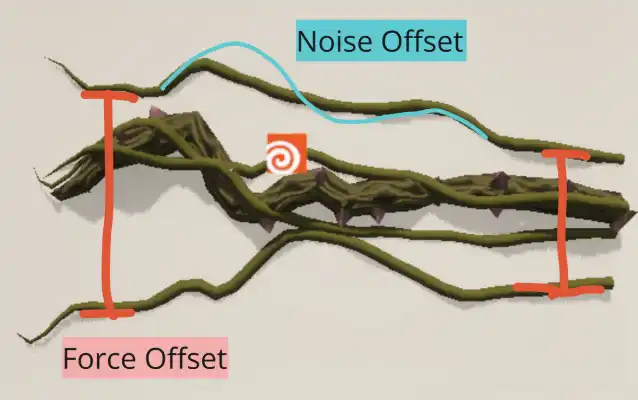
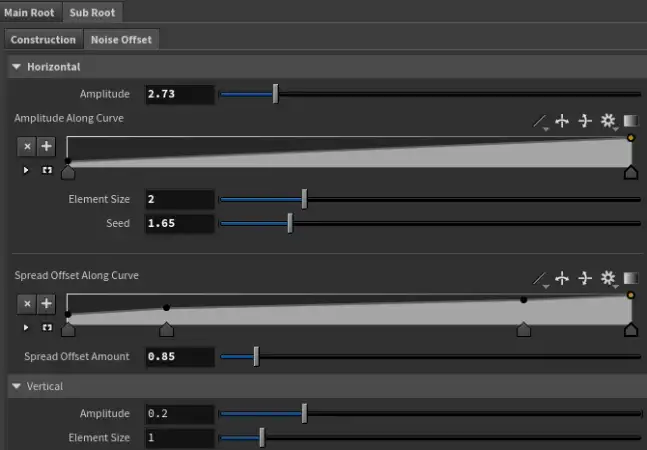
Noise is added to the main and sub root to add randomness to the growth path. Basic parameters such as amplitude, element size, and noise along curve multiplier are exposed.
For the sub roots specifically, I added a force offset parameter, which spreads out the subroots from eachother along the curve. This ensures good coverage and allows the subroot to spread out more at the end, achieving that sprawling look.
- Create a grid points along the forward and up axis of the volume
- Two World Ray Hit Query nodes, one has rays going towards the right of the volume and one going the left
- With the projection node, the world ray hit query is set as the projection target and the points from the grid are projected to the target
Vertex Color
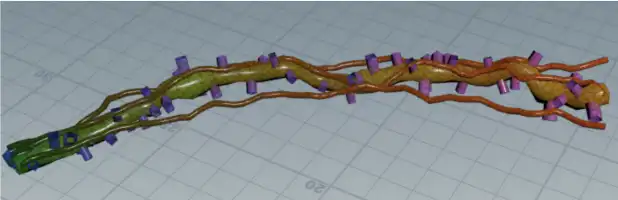
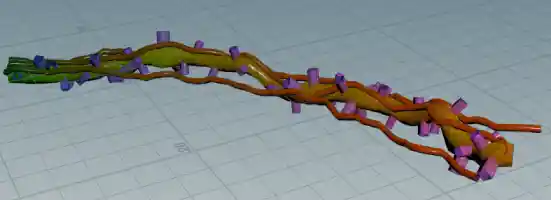
To combine with the root growth vertex animation, vertex colors are used as data for the vertex shader to use. The actual mesh doesn't have the tips tapered, but it is done through a vertex shader attached. This is done because the shader uses the vertex normals for the taper direction, so an already tapered tip will cause the normals not lining up properly and cause issues with the animation
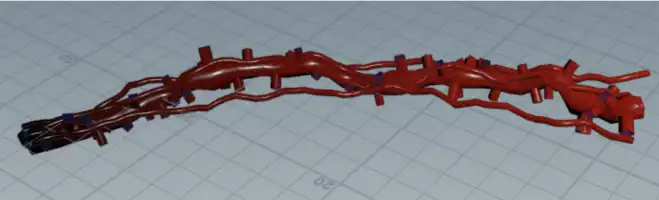
Red: A mask that represents the progress of a section along the curve, with 0% red at the starting point to 100% red at the end point.
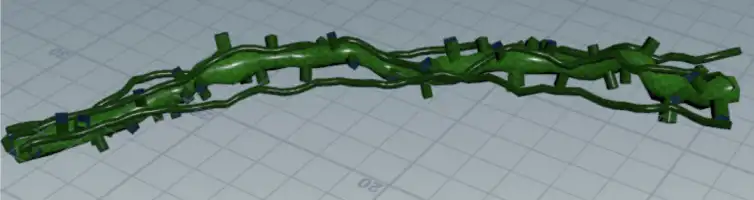
Green: This color represents the radius of the of a certain root's section. The roots have varying radiuses along the curve and between the two root types. Having the green channel as radius allows the shader to close the edge of the root to a clean point without manually inputting a radius parameter.
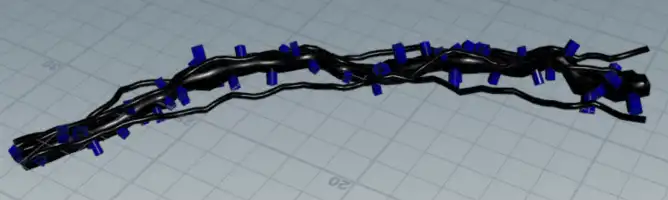
Blue: An added progress mask in addition to the red vertex color, this if for the spikes in this case. The spikes have to disappear first before the main root or it will be visibly floating. The blue vertex color is added to the red vertex color when calculating the shrink and mask for the shader.
Snap to Surface
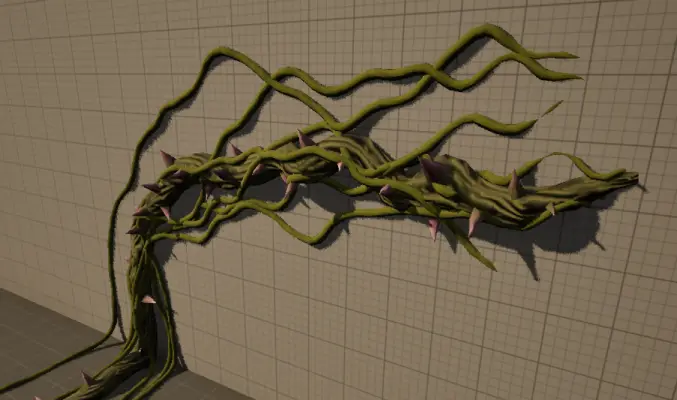
To help with the placement of the growing roots, a snap to surface feature is added. By default, the roots checks downwards of the according to its local direction and snaps to the hit location. This simplifies placing roots on uneven surfaces and allows easy placement when the surface changes angles, such as from floor to wall. However, a lot of inconsistencies will still surface and the roots might not properly detect a surface.
//Getting the local down
vector flatNorm = v@tangentu;
flatNorm.y = 0;
flatNorm = normalize(flatNorm);

v@right = cross({0,1,0}, flatNorm);

v@up = cross(@N, @right);
v@down = -v@up
Ray Visualizer
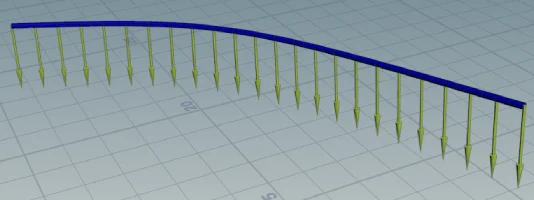
To help visualize the curve's rays or where it is checking for a surface, I added a line preview toggle. This adds a curve with arrows that points towards the direction of the rays in that section of the curve.
Rotating Ray Direction in Unreal
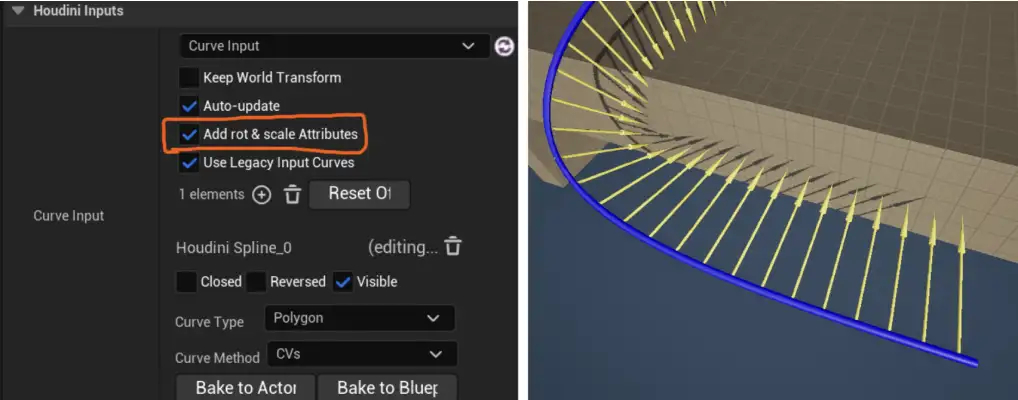
After further reading Houdini Engine's documentation for Unreal, I found that that Unreal allows users to rotate the points of the spline with Unreal's rotation gizmoe on the spline points, changing the rot attribute in Houdini. This can easily be used to edit the direction of the rays throughout the curve, adding more control. I made implemented the feature and this is how the the code looks.
vector worldUp = set(0,1,0);

//rotate all ray direction around the curve
float rotationOffset = radians(chf("rotation_Offset"));

//get transform identity matrix
matrix3 m = ident();

//rotate according to curve direction or tangent
rotate(m, rotationOffset, @N);

@up *= m; //rotate up vector
v@right *= m; //rotate right vector

//rotate points from UE5 curves (done with the rotation gizmo)
if(length(p@rot) > 0.01)
{
    v@up = qrotate(p@rot, v@up);
    v@right = qrotate(p@rot, v@right);
}

v@down = -@up; //get down vector
Self Overlap
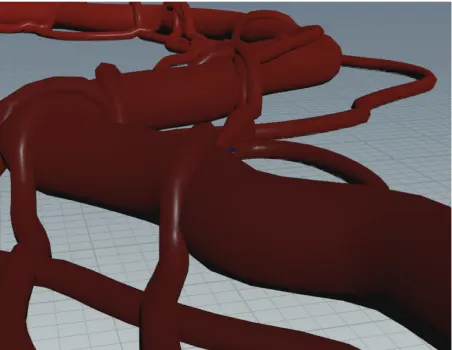
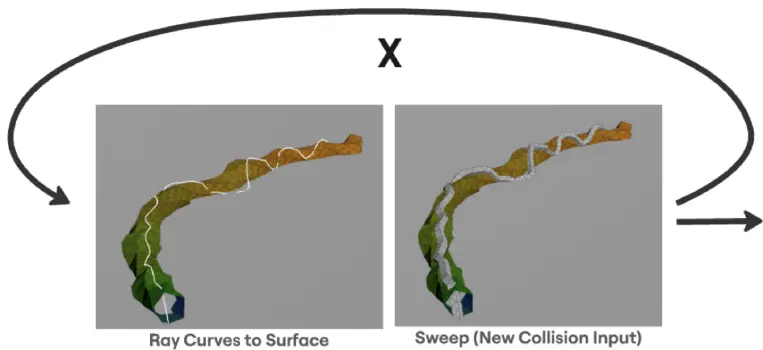
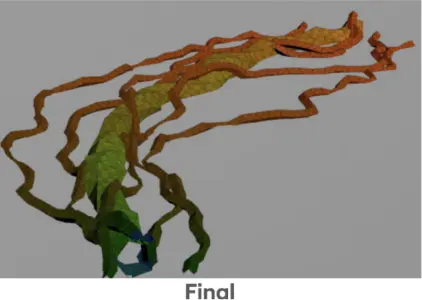
On top of growing on surfaces, I wanted the sub roots to grow on top of each other, making it look more alive and uncontrolled. This is done by looping through each sub root and use the previous iteration as collision inputs.
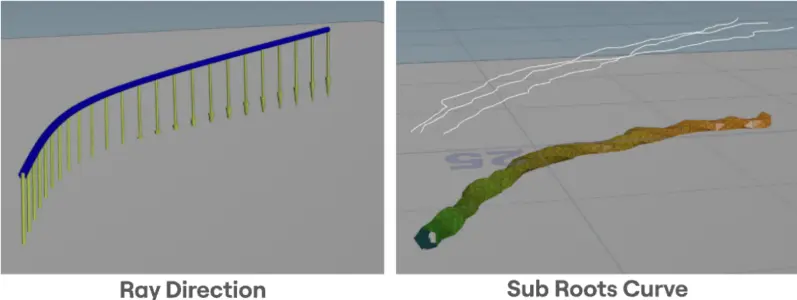
The sub roots move upwards or away from the curve to give space for the main roots and it checks a surface towards its local down direction.
After the sub roots curve snaps to the surface below, placing the points on the collision surface and overlaps the main root, it is swept to create the mesh. The new sub root mesh is combined with the main root and collision input, then it is used as a new collision input for the next interation. This allows subroots to also overlap eachother. This loops continue on up until the number of subroot reaches the number set in tool parameters